Introduction
Laser cutting involves burning the materials, causing smoke to stain the materials, providing a challenge when painting and glueing materials, and reducing the quality of the completed item.
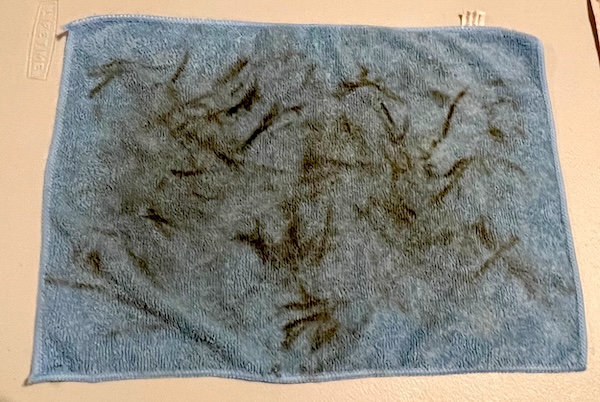
I was recommended to use masking to protect the materials, but I found covering the item with a film time-consuming and challenging from my wheelchair. Instead, I prefer to wipe laser-cut items of plywood and MDF with a slightly wet microfibre cloth. The image to the right shows the smoke removed from an artwork (scroll down to view the item).
The Masking Method: Time-Consuming but Precise
- What is Masking?
- Masking is applying a protective adhesive film or tape to the material’s surface before cutting to prevent smoke marks.
- Pros of Masking
- Superior surface protection, especially for high-end or delicate projects.
- Reduced risk of staining or scorching, ensuring a professional finish.
- Beneficial for materials with pre-applied finishes, like painted or laminated wood.
- Cons of Masking
- Time-Intensive: Application and removal of masking tape take time.
- Cost: Masking materials add an extra expense, especially for large-scale projects.
- Effort: Removing masking tape after cutting can be tedious, especially for intricate designs.
The Wet Rag Method: Simplicity and Cost-Effectiveness
- What is the Wet Rag Method?
- It involves using a slightly damp cloth to wipe away smoke and scorch marks from laser-cut surfaces after cutting.
- Pros of the Wet Rag Method
- Simple and Fast: Cleaning is quick and easy, reducing overall project time.
- Cost-Effective: No need for additional masking materials, keeping project costs low.
- Accessible: Requires only a basic rag and water—tools readily available in any workshop.
- Cons of the Wet Rag Method
- Less Effective on Stubborn Stains: Heavily scorched or uneven surfaces might require more effort to clean.
- Surface-Specific Limitations: This may not work well on porous materials that absorb water or on painted/finished surfaces that might smudge or streak.
Examples of the Wet Rag Method
 Before cleaning the smoke marks can be viewed on the artwork | 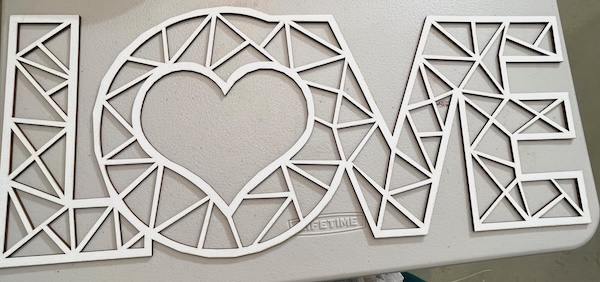 Following cleaning the artwork is much cleaner and ready to be painted. |
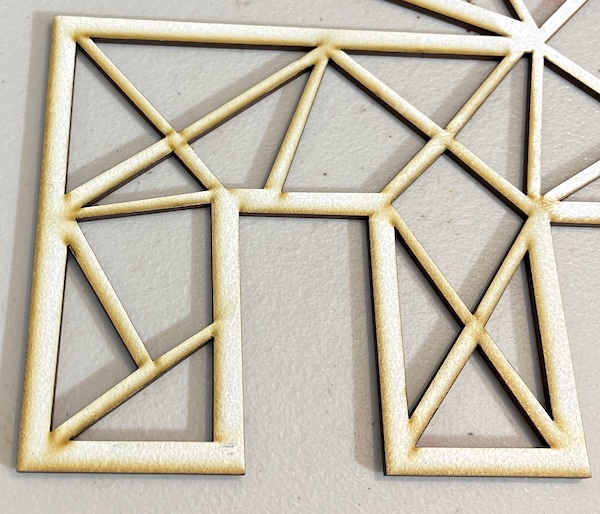 A close up of the smoke marks. | 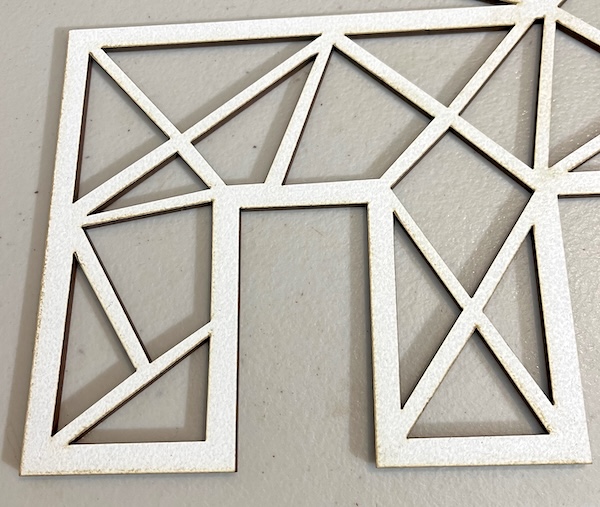 Much cleaner 🙂 |
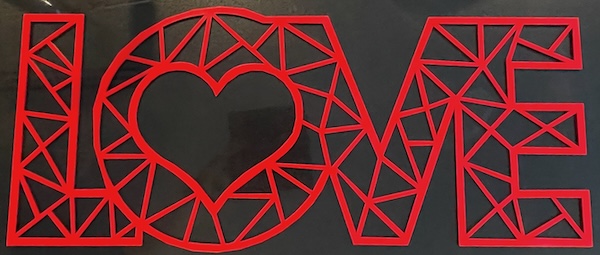
The completed artwork.
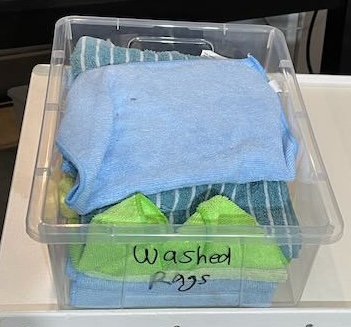 I gather the dirty rags into a bucket, and wash them on a hot cycle in the washing machine. | 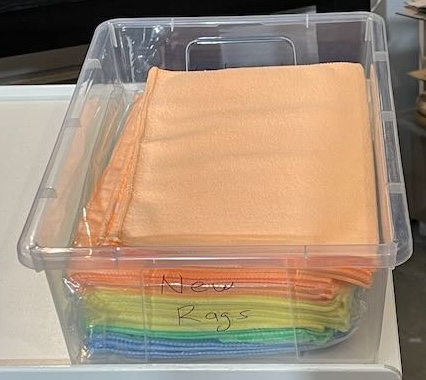 I have another container that holds new rags. |
Please look at my laser cutting projects, which provide tips, photos of my completed items, and the download links to the files. Alternatively, locate laser cutter projects via Google.