Opening
In this feature, we help you create the Cape Crusader Laser Cutting Build.
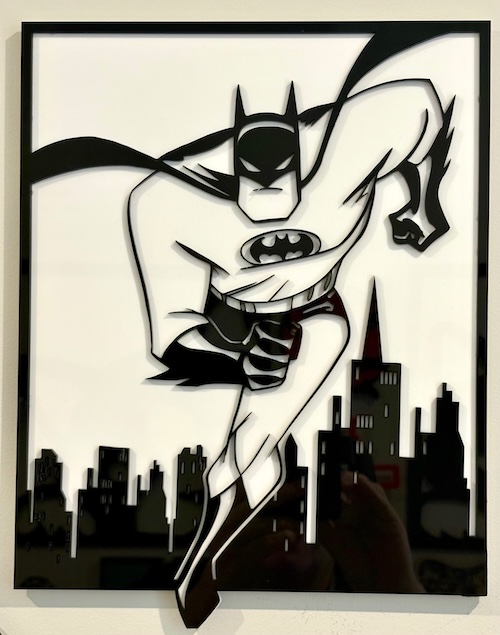
Bring Gotham’s hero to life with this dynamic laser-cut Batman artwork. Featuring a bold silhouette of the caped crusader rushing through a city skyline, this project is perfect for superhero fans and craft enthusiasts alike. The piece stands out as a unique decoration or thoughtful gift. Download the design files, follow the suggestions, and let your laser cutter create this heroic masterpiece. Perfect for home or office spaces!
- The Cape Crusader laser cutting Build is a wall artwork.
- A great gift choice for children.
- This laser cut design uses acrylic .
- It is an an easy Build, and I estimate it can be completed in 2 hours for acrylic.
However, the time required to complete this will depend on the laser cutter used, the overall dimensions of the design, and your level of experience. If you think the time estimate should be adjusted, feel free to share your thoughts via a comment below.
The free design can be downloaded here. (please notify me if the link is down)
Assembly guide
Step 1. Start by preparing your materials

- Acrylic: Choose the acrylic colours and use a protective film if required.

Step 2. Ready the design file for cutting

- use the source link to download the design file listed on the project page.
- Unzip the file to access the SVG.
- Load the SVG into your laser cutting software.

Step 3. Configure the laser cutter

- Adjust the design size to fit your chosen material dimensions.
- Set the appropriate laser parameters:
- Cut: Specify power and speed for clean cuts.
- Review your laser cutter’s documentation for material-based settings.

Step 4. Carry out the laser cutting steps

- Position the material on the laser bed.
- Run the cutting process.

Step 5. Carry out post-cut cleanup

- For Acrylic: Remove any protective film from the material after cutting.

Step 6. Assemble the finished layers

- Align the two layers carefully to ensure proper alignment of the design.
- Use appropriate adhesives:
- Acrylic Adhesive for acrylic.
- Use clamps to secure the layers while the adhesive dries. Placing a heavy object on top than using clamps may be more manageable.

Step 7. Prepare the design for mounting

- Attach a hanging mechanism, such as adhesive strips, to the back of the artwork.
- Verify that the mechanism is suitable for the wall surface.

You’ve successfully completed Cape Crusader! Take a photo, share it, and enjoy the final piece.

     If you enjoyed this project, please share your experience and leave a comment below.
Need some help?
- Leave a question
The completed Cape Crusader