Outline
In this webpage, we help you create the Holy Night, Handmade Delight Laser Cutting Design.
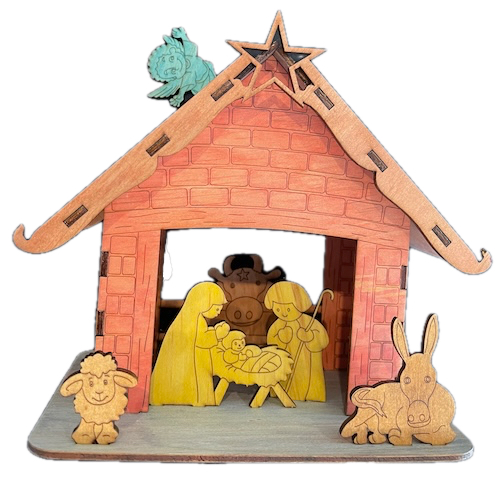
Celebrate the season with this charming, rustic nativity scene, laser-cut and painted for a delightful handmade look. Featuring Mary, Joseph, Baby Jesus, and an array of animals, this piece adds warmth to any holiday decor. Download the design files and read the helpful tips to craft your festive nativity scene, perfect as a unique Christmas decoration or a meaningful gift for friends and family. Bring the spirit of Christmas to life!
- The Holy Night, Handmade Delight laser cutting Design is a toy.
- Often chosen as a gift for children.
- This laser cut design uses 3mm plywood.
- It is an an intermediate Design, and the project can usually be completed in 3 hours.
However, the time needed to complete this project will depend on the laser cutter used, the size of the project, and your experience level. If you think the timing should be adjusted, you can share feedback via a comment below.
The free design can be downloaded here. (please notify me if the link is down)
How-to guide
Step 1. Gather and prepare all materials

- Plywood: Choose stains or dyes to be applied after laser cutting to enhance the natural wood texture.

Step 2. Access and prepare the design files

- obtain the design file through the source link included on the project page.
- Unzip the file to access the SVG.
- Load the SVG into your laser cutting software.

Step 3. Configure cutting parameters

- Please don't adjust the design size. Instead, move pieces around to fit on your cutting area.
- Set the appropriate laser parameters:
- Cut: Specify power and speed for clean cuts.
- Score: Specify power and speed to ensure the scoring can be visible once the stain is applied.
- Use the manufacturer’s guidance when selecting material-specific parameters.

Step 4. Start cutting the design

- Place your chosen material onto the laser bed surface.
- Run the cutting and scoring processes.

Step 5. Complete post-cut finishing

- For Plywood: Wipe smoke marks away with a slightly damp rag. Apply the wood stain or dye.

Step 6. Build the final layered design

- Use appropriate adhesives:
- Wood Glue for plywood.

You’ve brought it all together and completed Holy Night, Handmade Delight! Take a moment to admire the craftsmanship and enjoy the finished result.

     If you enjoyed this project, please share your experience and leave a comment below.
The completed Holy Night, Handmade Delight