Introduction
In this article, we help you create the KISS Your Boring Clock Goodbye Laser Cutting Creation.
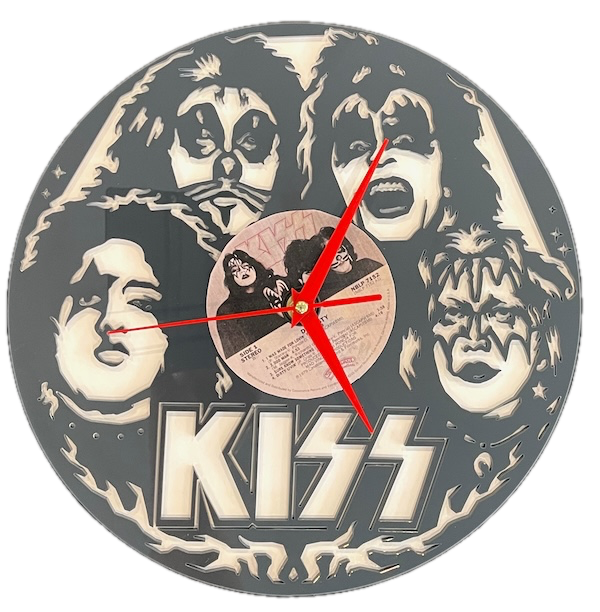
Celebrate your love for KISS with this bold and unique laser-cut clock. Featuring intricate cutouts of the iconic KISS band members’ faces and their unmistakable logo, this clock also incorporates an authentic vinyl record as its centerpiece. Perfect for fans of rock music, this clock is both an art piece and a functional timekeeper.
- The KISS Your Boring Clock Goodbye laser cutting Creation is a wall clock.
- Commonly given as a gift for all ages.
- This laser cutting project uses acrylic .
- It is an an easy Creation, and it can typically be completed in 2.25 hours for acrylic.
However, the overall completion time will depend on the laser cutter you are using, how large the project is, and your skill level. If you think the estimated timing should be adjusted, please feel free to let me know via a comment below.
The free design can be downloaded here. (please notify me if the link is down)
Build instructions
Step 1. Get your materials ready

Acrylic: Choose the acrylic colours and apply a protective film if necessary. (I decided to use MDF with spray paint as the background to save money.)
- Clock mechanism: Purchase the appropriate clock mechanism and hand colour. Ensure your clock mechanism has a sufficiently long shaft to allow the shaft to pass through the materials.
Record label: You can use the record label in the design file or source your own.

Step 2. Download and prepare the design file

- use the source link to download the design file listed on the project page.
- Unzip the file to access the SVG.
- Load the SVG into your laser cutting software.
- Record label: Resize the record label to suit the clock and print it on a colour printer.

Step 3. Set up the laser cutter correctly

- Adjust the design size to fit your chosen material dimensions.
- Ensure the middle hole is sufficiently large to fit the clock mechanism.
- If you don't want the record groves, remove them from the design.
- Set the appropriate laser parameters:
- Cut: Specify power and speed for clean cuts.
- Score: Specify power and speed to ensure the record groves are visible.
- Use your laser cutter’s guidelines to determine material-specific settings.

Step 4. Run the laser cutter

- Place the selected material onto the laser bed.
- Run the cutting and scoring process.

Step 5. Complete post-cut finishing

- For Acrylic: Remove any protective film from the materials after cutting.

Step 6. Carefully assemble the design

- Align the layers carefully to ensure proper alignment of the design.
- Place the record label on the clock.
- Use appropriate adhesives:
- Use clamps to secure the layers while the adhesive dries.
- Attach the clock mechanism and hands.

Step 7. Get the piece ready to hang

- Attach a hook to the wall and hang the clock.

You’ve successfully completed KISS Your Boring Clock Goodbye! Put it on display and enjoy the finished look.

     If you enjoyed this project, please share your experience and leave a comment below.
The completed KISS Your Boring Clock Goodbye