Summary
In this feature, we help you create the Modern Van Gogh Starry Night Laser Cutting Work.
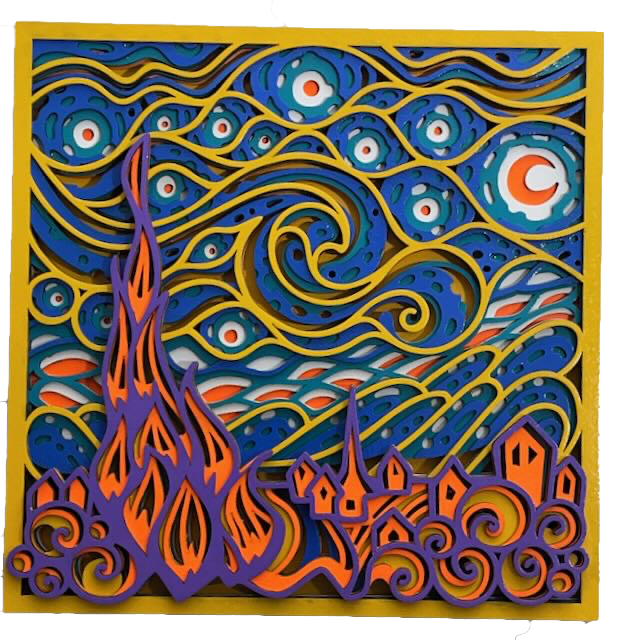
Add this contemporary multi-layered rendition of Vincent van Gogh's "Starry Night" to your wall space. Comprising eight layers and crafted from acrylic, MDF, or plywood, this vibrant wall art is suitable for both children and adults. Its intricate design and bold colours bring a touch of artistic brilliance to any room.
- The Modern Van Gogh Starry Night laser cutting Work is a wall artwork.
- Suitable as a gift for all ages.
- This item uses acrylic or MDF or plywood.
- It is an a challenging Work, and it should generally be completed in 3.5 hours for acrylic, 4.5 hours for MDF and 4 hours for plywood.
However, the overall completion time will depend on the laser cutter you are using, the physical size of the project, and your individual experience level. If you think the estimated timing should be adjusted, you’re welcome to let me know via a comment below.
The paid design can be downloaded here. (please notify me if the link is down)
Beginner-friendly instructions
Step 1. Get your materials ready

- Acrylic: Choose acrylics to match the example and use a protective film if required.
- MDF: Prepare MDF by painting it with a white undercoat and selecting paint colours to finish after the laser cutting.
- Plywood: Choose stains or dyes to be applied after laser cutting to enhance the natural wood texture.

Step 2. Prepare the design file for laser cutting

- use the source link to download the design file included on the project page.
- extract the contents of the file to access the design.
- open the design file in your laser software.

Step 3. Adjust laser settings for the materials

- Adjust the design size to fit your chosen material dimensions.
- Set the appropriate laser parameters:
- Cut: Specify power and speed for clean cuts.
- Refer to the laser cutter manual for recommended material settings.

Step 4. Begin cutting the project

- Lay the material flat on the laser bed.
- Run the cutting process for all required layers.
- Ensure that the layers align correctly as they are cut.

Step 5. Clean and finish the cut pieces

- For MDF: Use a damp cloth to remove smoke marks. Paint the layers once clean. Spray paint gives the best finish.
- For Plywood: Clean smoke residue with a damp rag, then apply stain or dye.
- For Acrylic: Remove protective film after cutting.

Step 6. Complete the assembly process

- Align the layers carefully to ensure proper alignment of the design.
- Use appropriate adhesives:
- Acrylic Adhesive for acrylic.
- Wood Glue for MDF or plywood.
- Use clamps to secure the layers while the adhesive dries.
- For MDF and plywood, use a gloss spray to enhance and protect the artwork.
- Attach a hanging mechanism, such as adhesive strips, to the back of the artwork.
- Verify that the mechanism is suitable for the wall surface.

Nice job finishing Modern Van Gogh Starry Night! Take a photo, share it, and enjoy the final piece.

     If you enjoyed this project, please share your experience and leave a comment below.
Not sure where to start?
- Laser cut items – masking vs cleaning with a wet rag
- 50 Laser Cutting tips
- Create sample swatches of your paints, stains and dyes for laser cutting
- Leave a question
The completed Modern Van Gogh Starry Night