Intro
In this page, we help you create the Silent Night Meets Laser Light Laser Cutting Project.
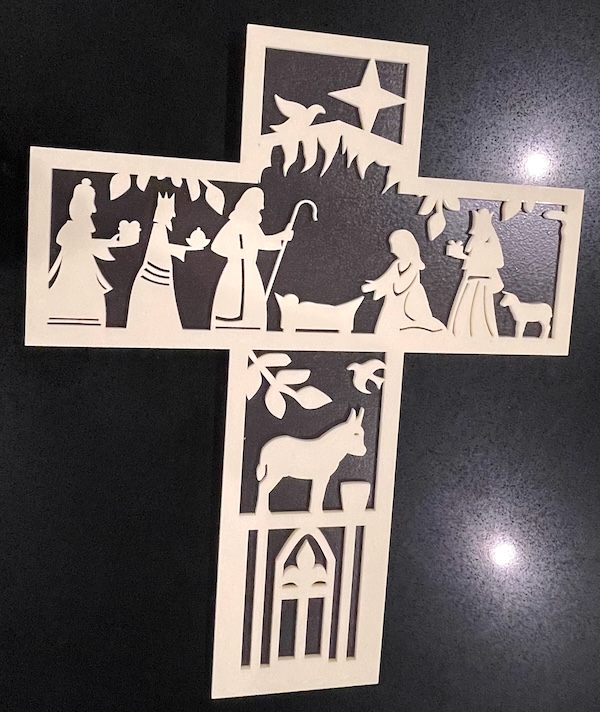
Celebrate the true spirit of Christmas with this beautifully laser-cut Nativity Cross. Featuring intricate silhouettes of the Holy Family, the Magi, animals, and the Star of Bethlehem, this design captures the reverence of the season. The cross-shaped design is perfect for display on walls or mantels. Download the design files, follow the tips and craft this inspiring piece. Whether for personal use or as a heartfelt gift, this project will light up any home.
- The Silent Night Meets Laser Light laser cutting Project is a wall artwork.
- A unique gift choice for all ages.
- This laser cutting project uses acrylic or MDF or plywood.
- It is an an easy Project, and I expect the design can be completed in 1.5 hours for acrylic, 2.5 hours for MDF or 2 hours for plywood.
However, the time it takes to complete this design will depend on the laser cutter used, the final dimensions of the design, and your skill level. If you think the time estimate should be adjusted, please feel free to let me know via a comment below.
The paid design can be downloaded here. (please notify me if the link is down)
Assembly guide
Step 1. Prepare all materials for cutting

- Acrylic: Choose the acrylic colours and use a protective film if required.
- MDF: Prepare MDF by painting it with a white undercoat and selecting paint colours to finish after the laser cutting.
- Plywood: Choose stains or dyes to be applied after laser cutting to enhance the natural wood texture.

Step 2. Set up the project design files

- access the source link to download the design file shown on the project page.
- unzip the downloaded file to view the design.
- open the design in your laser cutting software.

Step 3. Configure the laser cutter

- Adjust the design size to fit your chosen material dimensions.
- Set the appropriate laser parameters:
- Cut: Specify power and speed for clean cuts.
- Refer to your laser cutter’s guidelines for material-specific settings.

Step 4. Cut all required layers

- Place the material correctly on the laser bed.
- Run the cutting process.

Step 5. Finish materials after cutting

- For MDF: Use a damp cloth to remove smoke marks. Paint the layers once clean. Spray paint gives the best finish.
- For Plywood: Clean smoke residue with a damp rag, then apply stain or dye.
- For Acrylic: Remove protective film after cutting.

Step 6. Assemble the finished layers

- Align the layers carefully to ensure proper alignment of the design.
- Use appropriate adhesives:
- Acrylic Adhesive for acrylic.
- Wood Glue for MDF or plywood.
- Use clamps to secure the layers while the adhesive dries.
- For MDF and plywood, use a gloss spray to enhance and protect the artwork.

Step 7. Attach mounting hardware

- Attach a hanging mechanism, such as adhesive strips, to the back of the artwork.
- Verify that the mechanism is suitable for the wall surface.

All steps are finished — you’ve completed Silent Night Meets Laser Light! Hang it in your chosen spot and enjoy the finished piece.

     If you enjoyed this project, please share your experience and leave a comment below.
The completed Silent Night Meets Laser Light