Overview
In this page, we help you create the Silent Paws Laser Cutting Design.
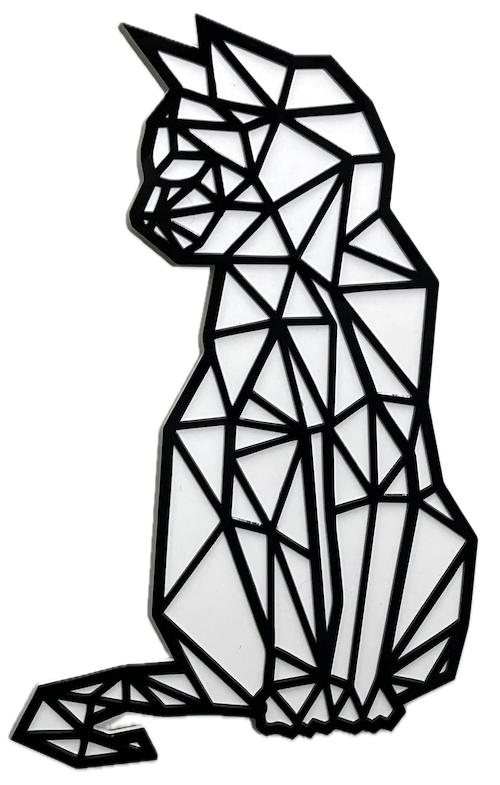
This striking geometric cat artwork features a black outlined cat in a seated pose, composed of intricate triangular patterns. The minimalist yet captivating design makes it a perfect addition to modern and contemporary spaces. Ideal for cat lovers and art enthusiasts alike, this artwork adds a touch of elegance and sophistication to any room.
- The Silent Paws laser cutting Design is a wall artwork.
- A meaningful gift for all ages.
- The project is constructed using acrylic or MDF or plywood.
- It is an an easy Design, and I estimate this can be completed in 90 minutes.
However, the total time to complete this will depend on the laser cutter in use, the final dimensions of the design, and your skill level. If you feel the completion time should be adjusted, please let me know via a comment below.
The free design can be downloaded here. (please notify me if the link is down)
Build guide
Step 1. Start by preparing your materials

- Acrylic: Choose the acrylic colours and use a protective film if required.
- MDF: Prepare MDF by painting it with a white undercoat and selecting paint colours to finish after the laser cutting.
- Plywood: Choose stains or dyes to be applied after laser cutting to enhance the natural wood texture.

Step 2. Load and prepare the design file

- download the project design file from the source link available on the project page.
- Unzip the file to access the SVG.
- Load the SVG into your laser cutting software.

Step 3. Configure the laser cutter

- Adjust the design size to fit your chosen material dimensions.
- Set the appropriate laser parameters:
- Cut: Specify power and speed for clean cuts.
- Use your laser cutter’s guidelines to determine material-specific settings.

Step 4. Carry out the laser cutting steps

- Place the material correctly on the laser bed.
- Run the cutting process.
- Do this for the front and back layers.

Step 5. Clean and prepare pieces after cutting

- For MDF: Use a damp cloth to remove smoke marks. Paint the layers once clean. Spray paint gives the best finish.
- For Plywood: Clean smoke residue with a damp rag, then apply stain or dye.
- For Acrylic: Remove protective film after cutting.

Step 6. Assemble the finished layers

- Align the layers carefully to ensure proper alignment of the design.
- Use appropriate adhesives:
- Acrylic Adhesive for acrylic.
- Wood Glue for MDF or plywood.
- Use clamps to secure the layers while the adhesive dries.
- For MDF and plywood, use a gloss spray to enhance and protect the artwork.

Step 7. Attach mounting hardware

- Attach a hanging mechanism, such as adhesive strips, to the back of the artwork.
- Verify that the mechanism is suitable for the wall surface.

After working through the steps, you’ve completed Silent Paws! Enjoy the finished design and the satisfaction of making it yourself.

     If you enjoyed this project, please share your experience and leave a comment below.
The completed Silent Paws