Introduction
In this post, we help you create the Steampunk Marvel Clock Laser Cutting Work.
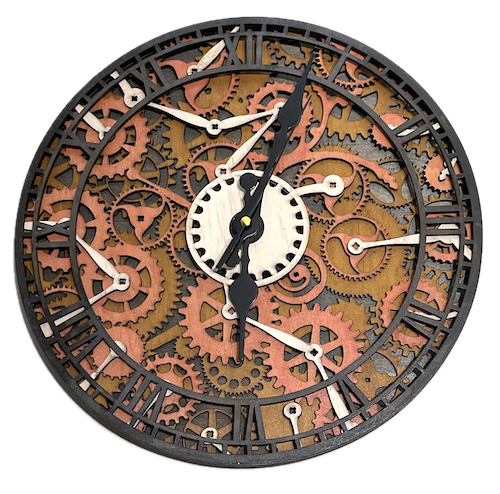
This intricate steampunk-inspired laser-cut clock, featuring detailed gears and Roman numerals, will be a talking point. Perfect for both decor and functional item use, this design offers a rewarding challenge for laser cutting enthusiasts. Its vintage aesthetic and mechanical charm make it a standout piece that adds sophistication to any room.
- The Steampunk Marvel Clock laser cutting Work is a wall clock.
- Commonly given as a gift for all ages.
- The project is made using plywood.
- It is an a challenging Work, and I expect it should be completed in 4 hours.
However, the overall completion time will depend on the laser cutter you are using, the size of the project, and your confidence with laser cutting. If you believe the time estimate should be adjusted, please feel free to let me know via a comment below.
The paid design can be downloaded here. (please notify me if the link is down)
Step-by-step instructions
Note:

Step 1. Begin with material preparation

- Plywood: Choose stains or dyes to be applied after laser cutting to enhance the natural wood texture.
- Clock mechanism: I didn't cut the hands. Instead, I used the hands that came with clock mechanisms from Etsy. Ensure your clock mechanism has a sufficiently long shaft to allow the shaft to pass through the multiple layers of plywood. Otherwise, you will need to cut the rear layer in the shape of the clock mechanism.

Step 2. Load and prepare the design file

- download the project design file from the source link shown on the project page.
- extract the archive to view the design.
- open the design in your laser cutting software.

Step 3. Configure cutting parameters

- Adjust the design size to fit your chosen material dimensions.
- Ensure the middle hole is sufficiently large to fit the clock mechanism.
- Set the appropriate laser parameters:
- Cut: Specify power and speed for clean cuts.
- Check your laser cutter’s documentation for material-specific parameters.

Step 4. Execute the laser cutting process

- Place your chosen material onto the laser bed surface.
- Run the cutting process for all required layers.
- Ensure that the layers align correctly as they are cut.

Step 5. Complete post-cut finishing

- For Plywood: Wipe smoke marks away with a slightly damp rag. Apply the wood stain or dye.

Step 6. Assemble the layers

- Align the layers carefully to ensure proper alignment of the design.
- Use appropriate adhesives:
- Wood Glue for plywood.
- I clamped and glued the rear two layers together and did the same for the front two. Then, I placed the middle layer, added glue and clamped the clock.
- Attach the clock mechanism and hands.
- Attach a hook to the wall and hang the clock.

With the final step done, you’ve completed Steampunk Marvel Clock! Hang it in your chosen spot and enjoy the finished piece.

     If you enjoyed this project, please share your experience and leave a comment below.
Need help getting started?
- Laser cut items – masking vs cleaning with a wet rag
- 20 Laser Engraving Tips
- 25 Common Laser Cutting Mistakes and How to Avoid Them
- Leave a question
The completed Steampunk Marvel Clock