Summary
In this article, we help you create the The Force of Creativity: Star Wars in 3D Laser Cutting Project.
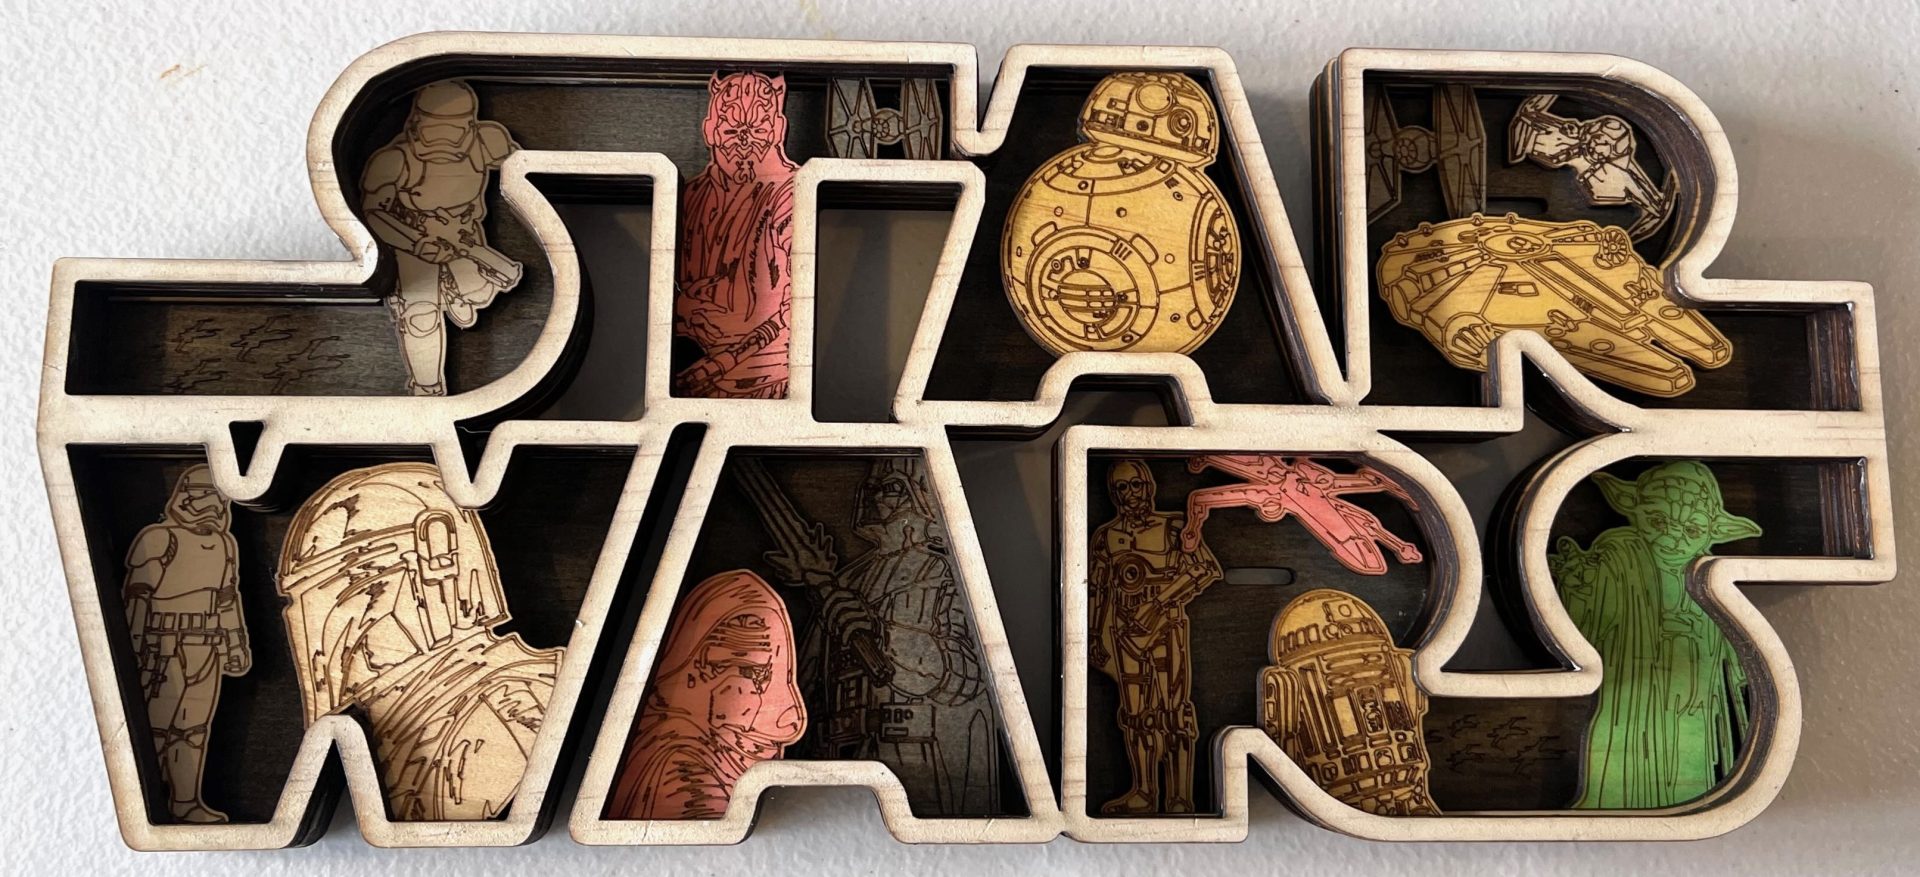
This Star Wars-themed wall art features intricately laser-cut designs inside the iconic “STAR WARS” text. Each letter is filled with detailed representations of fan-favourite characters, ships, and scenes, such as Darth Vader, Yoda, the Millennium Falcon, and more. Download the project files and bring the galaxy far, far away into your space!
- The The Force of Creativity: Star Wars in 3D laser cutting Project is a wall artwork.
- Well suited as a gift for all ages.
- This project uses plywood.
- It is an an intermediate Project, and I estimate this project can be completed in 3.5 hours.
However, the time required to complete this will depend on the laser cutter used, how large the project is, and your comfort level with laser cutting. If you believe the timing should be adjusted, feel free to let me know via a comment below.
The free design can be downloaded here. (please notify me if the link is down)
Clear assembly instructions
Step 1. Prepare materials before starting

- Plywood: Choose stains or dyes to be applied after laser cutting to enhance the natural wood texture.

Step 2. Prepare the design file for laser cutting

- use the source link to download the design file listed on the project page.
- Unzip the file to access the SVG.
- Load the SVG into your laser cutting software.

Step 3. Prepare laser cutter settings

- Adjust the design size to fit your chosen material dimensions.
- Set the appropriate laser parameters:
- Cut: Specify power and speed for clean cuts.
- Check your laser cutter’s documentation for material-specific parameters.

Step 4. Start cutting the design

- Place the material correctly on the laser bed.
- Run the cutting processes for all required pieces.

Step 5. Clean up after laser cutting

- For Plywood: Wipe smoke marks away with a slightly damp rag. Apply the wood stain or dye.

Step 6. Secure and assemble all layers

- Use appropriate adhesives:
- Wood Glue for plywood. Clamp two layers at a time until the artwork is complete.
- Attach a hanging mechanism, such as adhesive strips, to the back of the artwork.
- Verify that the mechanism is suitable for the wall surface.

That’s it — you’ve completed The Force of Creativity: Star Wars in 3D! Your project is complete and ready to be enjoyed.

     If you enjoyed this project, please share your experience and leave a comment below.
Need help getting started?
- Laser Cutting: A Beginner’s Guide to Getting Started
- 50 Laser Cutting tips
- Laser cut items – masking vs cleaning with a wet rag
- Leave a question
The completed The Force of Creativity: Star Wars in 3D