Opening
In this article, we help you create the Timeless Fab Four Laser Cutting Creation.
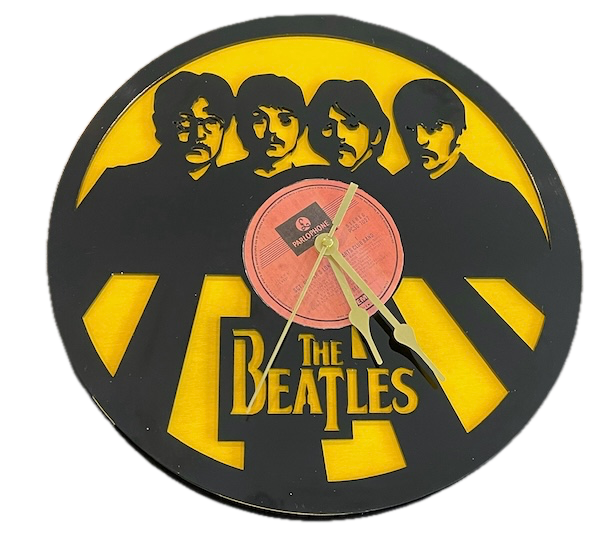
This unique clock features an iconic silhouette of The Beatles, laser cut from acrylic, with the band's name prominently displayed underneath. Perfect for any music enthusiast or Beatles fan, this clock is a functional timepiece and a striking piece of art. Its design captures the essence of classic rock with a modern twist.
- The Timeless Fab Four laser cutting Creation is a wall clock.
- A creative gift idea for all ages.
- This design is created using acrylic .
- It is an an easy Creation, and I expect this can be completed in 2.5 hours.
However, the time involved in completing this will depend on the laser cutter used, the overall dimensions of the design, and your familiarity with laser cutting. If you feel the estimated timing should be adjusted, feedback is welcome via a comment below.
The free design can be downloaded here. (please notify me if the link is down)
Beginner-friendly instructions
Step 1. Get materials prepared for the project

Acrylic: Choose the acrylic colours and apply a protective film if necessary. (I decided to use MDF with spray paint as the background to save money.)
- Clock mechanism: Purchase the appropriate clock mechanism and hand colour. Ensure your clock mechanism has a sufficiently long shaft to allow the shaft to pass through the materials.
Record label: You can use the record label in the design file or source your own.

Step 2. Access and prepare the design files

- use the source link to download the design file supplied on the project page.
- Unzip the file to access the SVG.
- Load the SVG into your laser cutting software.
- Record label: Resize the record label to suit the clock and print it on a colour printer.

Step 3. Set up your laser cutter and settings

- Adjust the design size to fit your chosen material dimensions.
- Ensure the middle hole is sufficiently large to fit the clock mechanism.
- If you don't want the record groves, remove them from the design.
- Set the appropriate laser parameters:
- Cut: Specify power and speed for clean cuts.
- Score: Specify power and speed to ensure the record groves are visible.
- Use the manufacturer’s guidance when selecting material-specific parameters.

Step 4. Cut the design using the laser cutter

- Position the material on the laser bed.
- Run the cutting and scoring process.

Step 5. Carry out post-cut cleanup

- For Acrylic: Remove any protective film from the materials after cutting.

Step 6. Secure and assemble all layers

- Align the layers carefully to ensure proper alignment of the design.
- Place the record label on the clock.
- Use appropriate adhesives:
- Use clamps to secure the layers while the adhesive dries.
- Attach the clock mechanism and hands.

Step 7. Get the piece ready to hang

- Attach a hook to the wall and hang the clock.

All steps are finished — you’ve completed Timeless Fab Four! Enjoy the finished design and the satisfaction of making it yourself.

     If you enjoyed this project, please share your experience and leave a comment below.
Stuck and need help?
- Laser cut items – masking vs cleaning with a wet rag
- Laser Cutting: A Beginner’s Guide to Getting Started
- Create sample swatches of your paints, stains and dyes for laser cutting
- Leave a question
The completed Timeless Fab Four