Outline
In this article, we help you create the Circles of Function key holder Laser Cutting Design.
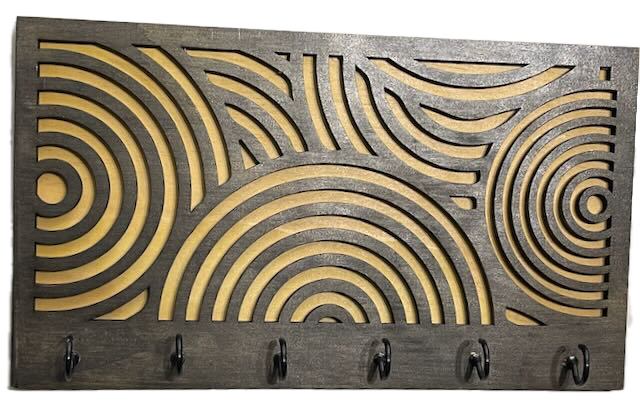
Place this eye-catching key holder on your wall. It features a series of laser-cut concentric circles. Perfect for adding both style and functional itemity, this project is ideal for those looking for a functional item laser cut. The intricate yet accessible design ensures a rewarding laser cutting experience, resulting in a practical and artistic piece for your home.
- The Circles of Function key holder laser cutting Design is a functional item.
- Often chosen as a gift for adults.
- This laser cut design uses 3mm plywood .
- It is an an intermediate Design, and this should generally be completed in 2.5 hours.
However, the completion duration will depend on the laser cutter you are working with, the size of the design, and your confidence with laser cutting. If you believe the estimated timing should be adjusted, don’t hesitate to let me know via a comment below.
The paid design can be downloaded here. (please notify me if the link is down)
Easy-to-follow instructions
Step 1. Prepare the required materials

- Plywood: Choose stains or dyes to be applied after laser cutting to enhance the natural wood texture.

Step 2. Load and prepare the design file

- access the source link to download the design file found on the project page.
- unzip the downloaded file to view the design.
- import the design file into your laser software.

Step 3. Adjust laser settings for the materials

- Adjust the design size to fit your chosen material dimensions.
- Set the appropriate laser parameters:
- Cut: Specify power and speed for clean cuts.
- Refer to your laser cutter’s guidelines for material-specific settings.

Step 4. Carry out the laser cutting steps

- Position the material evenly on the laser bed.
- Run the cutting process for all required layers.
- Ensure that the layers align correctly as they are cut.

Step 5. Complete finishing after cutting

- For Plywood: Wipe smoke marks away with a slightly damp rag. Apply the wood stain or dye.

Step 6. Put the layers together

- Align the layers carefully to ensure proper alignment of the design.
- Use appropriate adhesives:
- Wood Glue for plywood.
- Use clamps to secure the layers while the adhesive dries.
- A gloss spray enhances and protects the item.

Step 7. Ready the piece for mounting

- Secure the item to the wall. The bond must be able to hold the item's weight and keys.

You’ve now completed Circles of Function key holder! It’s now ready to be displayed and enjoyed.

     If you enjoyed this project, please share your experience and leave a comment below.
Looking for guidance?
- 20 Laser Engraving Tips
- Create sample swatches of your paints, stains and dyes for laser cutting
- 25 Common Laser Cutting Mistakes and How to Avoid Them
- Leave a question
The completed Circles of Function key holder