Intro
In this webpage, we help you create the Empire Strikes the Wall! Laser Cutting Design.
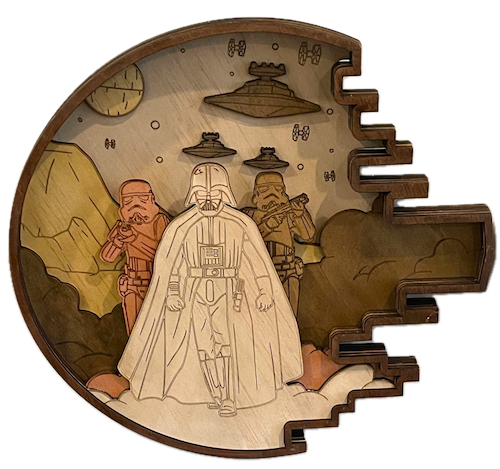
This laser-cut wooden wall art features an iconic scene from Star Wars. It captures Darth Vader flanked by stormtroopers and starships looming in the background. The intricate, multi-layered design creates depth and realism, making it aperfect or any Star Wars fan’s collection. This artwork is a fantastic gift or addition to any sci-fi enthusiast's space.
- The Empire Strikes the Wall! laser cutting Design is a wall artwork.
- Makes a thoughtful gift for all ages.
- This project uses plywood.
- It is an an intermediate Design, and it is estimated to be completed in 3 hours.
However, the total time to complete this will depend on the laser cutter in use, the finished size of the design, and your confidence with laser cutting. If you feel the time estimate should be adjusted, feedback is welcome via a comment below.
The free design can be downloaded here. (please notify me if the link is down)
Assembly instructions
Step 1. Ensure materials are ready to use

- Plywood: Choose stains or dyes to be applied after laser cutting to enhance the natural wood texture.

Step 2. Access and prepare the design files

- use the source link to download the design file included on the project page.
- Unzip the file to access the SVG.
- Load the SVG into your laser cutting software.

Step 3. Prepare the laser cutter for cutting

- Adjust the design size to fit your chosen material dimensions.
- Set the appropriate laser parameters:
- Cut: Specify power and speed for clean cuts.
- Score: Specify power and speed to ensure the scoring can be seen after applying stain or dye.
- Use the manufacturer’s guidance when selecting material-specific parameters.

Step 4. Cut the design using the laser cutter

- Place your chosen material onto the laser bed surface.
- Run the cutting and scoring processes for all required pieces.

Step 5. Finish and clean cut components

- For Plywood: Wipe smoke marks away with a slightly damp rag. Apply the wood stain or dye.

Step 6. Secure and assemble all layers

- Use appropriate adhesives:
- Wood Glue for plywood.
- Attach a hanging mechanism, such as adhesive strips, to the back of the artwork.
- Verify that the mechanism is suitable for the wall surface.

Great work completing Empire Strikes the Wall!! Your project is complete and ready to be enjoyed.

     If you enjoyed this project, please share your experience and leave a comment below.
Looking for help?
- Leave a question
The completed Empire Strikes the Wall!