Opening
In this post, we help you create the Shape Shifter's Playground Laser Cutting Design.
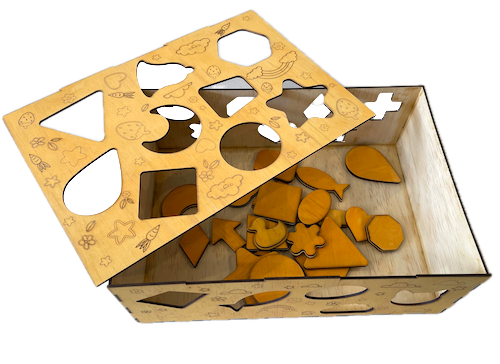
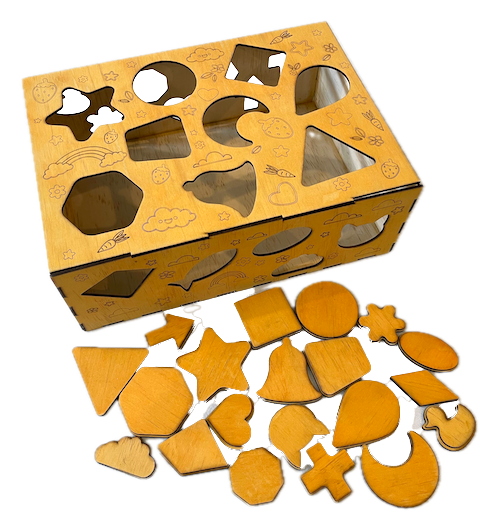
This wooden shape-sorting toy is an ideal educational tool for toddlers. It features various shapes like stars, hearts, and circles and encourages motor skills and shape recognition. Laser-cut precision ensures that each piece fits snugly in its designated spot. This project can be a fun DIY craft, perfect for a gift or as an addition to your child's playroom. Grab the design files and instructions today to get started.
- The Shape Shifter's Playground laser cutting Design is a toy.
- A creative gift idea for children.
- This laser cut design uses 3mm plywood.
- It is an an intermediate Design, and I estimate it can be completed in 3 hours.
However, how long this takes to complete will depend on the laser cutter being used, how large the project is, and your experience using similar designs. If you feel the estimated timing should be adjusted, please provide feedback via a comment below.
The paid design can be downloaded here. (please notify me if the link is down)
Assembly instructions
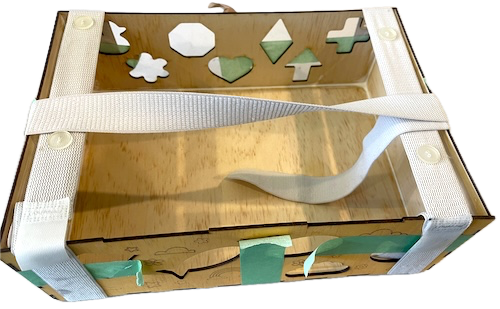
Note: the project should be cut from 3mm plywood. Consider applying the stain or dye before laser cutting.

Step 1. Get materials prepared for the project

- Plywood: Choose a stain or a dye to be applied after laser cutting to enhance the natural wood texture.

Step 2. Download and prepare the design file

- download the design file from the provided link listed on the project page.
- extract the downloaded file to access the design.
- import the design file into your laser software.

Step 3. Configure the cutter for this project

- Don't resize; otherwise, the project won't fit together. Move the pieces around to fit onto your plywood.
- Set the appropriate laser parameters:
- Cut: Specify power and speed for clean cuts.
- Follow your laser cutter’s recommended settings for each material type.

Step 4. Execute the laser cutting process

- Position the material on the laser bed.
- Run the cutting process for all required pieces.

Step 5. Carry out post-cut cleanup

- For Plywood: Wipe smoke marks away with a slightly damp rag. If you still need to, apply the wood stain or dye.

Step 6. Assemble the layers

- Use appropriate adhesives:
- Wood Glue for plywood.
- Follow the instructions provided from the place you purchased the design file.

That’s it — you’ve completed Shape Shifter's Playground! Step back, admire your work, and enjoy the finished piece.

     If you enjoyed this project, please share your experience and leave a comment below.
Looking for help?
- Leave a question
The completed Shape Shifter's Playground