Summary
In this webpage, we help you create the The Galactic Ruins: Death Star Wall Art Laser Cutting Build.
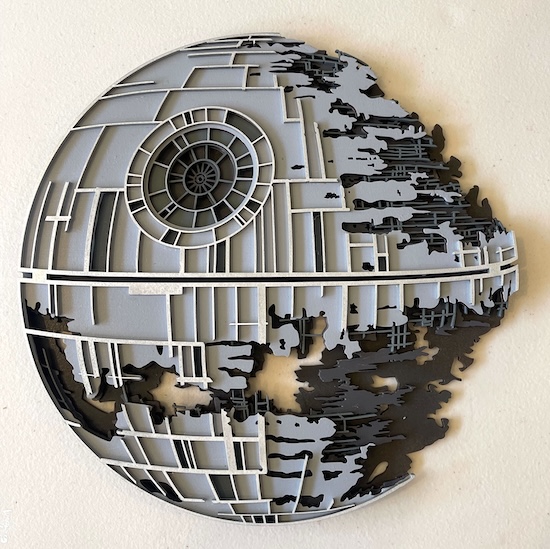
This intricate wall art piece depicts the iconic Death Star, skillfully laser cut to capture the essence of its battle-worn, half-destroyed form. The multi-layered design brings out the detailed structure, with precise cuts showing the complex grid and internal details. Finished in grey and black, this piece beautifully illustrates the mechanical layers of the space station, making it a perfect addition to any sci-fi enthusiast’s decor, adding depth and a touch of the galaxy to any room.
- The The Galactic Ruins: Death Star Wall Art laser cutting Build is a wall artwork.
- A meaningful gift for all ages.
- This laser cut design uses MDF or plywood.
- It is an an intermediate Build, and the design should generally be completed in 2.5 hours for plywood or 3.25 hours for MDF.
However, the total time to complete this will depend on the laser cutter in use, the overall size of the project, and your comfort level with laser cutting. If you believe the timing should be adjusted, please let me know via a comment below.
The free design can be downloaded here. (please notify me if the link is down)
Step-by-step instructions
Step 1. Get your materials ready

- MDF: Prepare MDF by painting it with a white undercoat and selecting a paint colour to finish after the laser cutting.
- Plywood: Choose stains or dyes to be applied after laser cutting to enhance the natural wood texture.

Step 2. Get the design file ready to use

- obtain the design file through the source link supplied on the project page.
- Unzip the file to access the SVG.
- Load the SVG into your laser cutting software.

Step 3. Configure cutting parameters

- Adjust the design size to fit your chosen material dimensions.
- Set the appropriate laser parameters:
- Cut: Specify power and speed for clean cuts.
- Refer to your laser cutter’s guidelines for material-specific settings.

Step 4. Start cutting the design

- Place the material correctly on the laser bed.
- Run the cutting process.

Step 5. Prepare cut parts for assembly

- For MDF: Wipe smoke marks away with a slightly damp rag. Paint the layers with your chosen colours. Spray paint is preferable to canned paint.
- For Plywood: Wipe smoke marks away with a slightly damp rag. Apply the wood stain or dye.

Step 6. Build the final layered design

- Use appropriate adhesives:
- Wood Glue for plywood and MDF. Clamp two layers at a time until the artwork is complete.

Step 7. Get the piece ready to hang

- Attach a hanging mechanism, such as adhesive strips, to the back of the artwork.
- Verify that the mechanism is suitable for the wall surface.

You’ve now completed The Galactic Ruins: Death Star Wall Art! Step back, admire your work, and enjoy the finished piece.

     If you enjoyed this project, please share your experience and leave a comment below.
Need some help?
- Create sample swatches of your paints, stains and dyes for laser cutting
- xTool P2 Laser Cutter
- 25 Common Laser Cutting Mistakes and How to Avoid Them
- Leave a question
The completed The Galactic Ruins: Death Star Wall Art