Outline
In this page, we help you create the Trace 'n' Learn Shapes Laser Cutting Project.
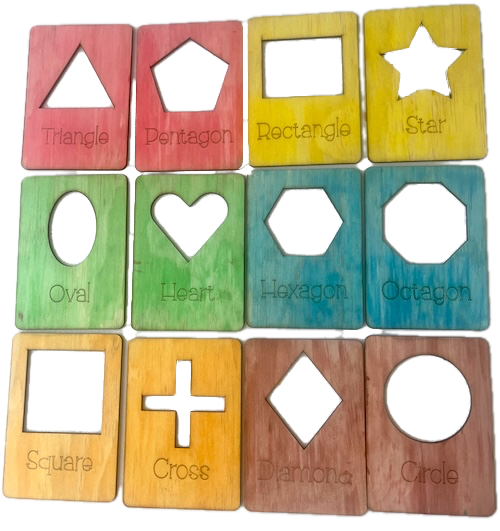
Dive into a learning adventure with these educational puzzle blocks. Each block is vibrantly colorured and labeled with the name of a different geometric shape, from classic circles to creative stars. Ideal for preschoolers, these tactile puzzle pieces enhance fine motor skills, shape recognition, and colour identification, making them a perfect educational tool.
- The Trace 'n' Learn Shapes laser cutting Project is a educational toy.
- Ideal as a gift for children.
- This project uses plywood.
- It is an an easy Project, and the design should generally be completed in 2.5 hours.
However, how long this takes to complete will depend on the laser cutter being used, the overall dimensions of the design, and your experience using similar designs. If you feel the time estimate should be adjusted, feel free to let me know via a comment below.
The paid design can be downloaded here. (please notify me if the link is down)
Instructions
Step 1. Prepare materials before starting

- Plywood: Choose stains or dyes to be applied after laser cutting to enhance the natural wood texture.

Step 2. Prepare the design file for laser cutting

- use the source link to download the design file accessible via the project page.
- unzip the file to access the design files.
- import the design into your laser cutting software.

Step 3. Prepare laser cutter settings

- Set the appropriate laser parameters:
- Cut: Specify power and speed for clean cuts.
- Score: Specify power and speed to ensure the scoring can be seen after applying stain or dye.
- Use your laser cutter’s guidelines to determine material-specific settings.

Step 4. Begin cutting the project

- Position the material on the laser bed.
- Run the cutting process for all required pieces.
- Consider adding a few extra middle layers to allow more money to be stored in the money box.

Step 5. Complete finishing after cutting

- For Plywood: Wipe smoke marks away with a slightly damp rag. Apply the wood stain or dye.

Step 6. Put the layers together

- Use appropriate adhesives:
- Wood Glue for plywood.

Step 7. Prepare the design for mounting

- A gloss spray enhances and protects the artwork for plywood.

Well done on finishing Trace 'n' Learn Shapes! Enjoy seeing the finished result come together.

     If you enjoyed this project, please share your experience and leave a comment below.
Not sure where to start?
- Leave a question
The completed Trace 'n' Learn Shapes